By Jamie and Todd
Pennsylvania


Pennsylvania
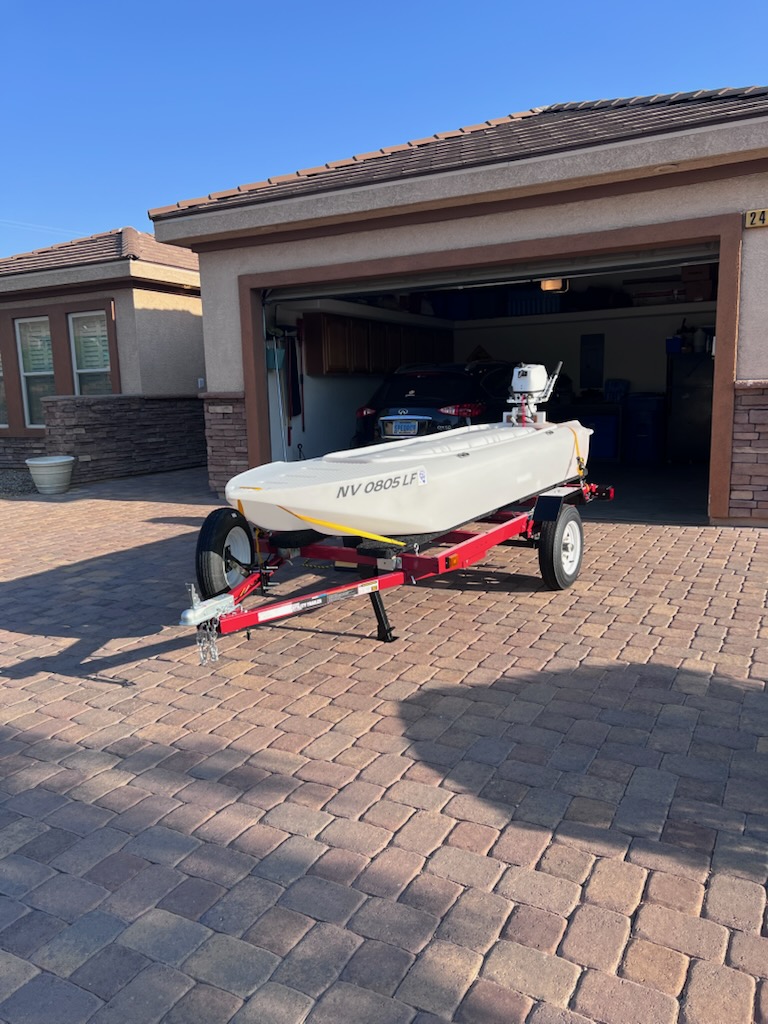
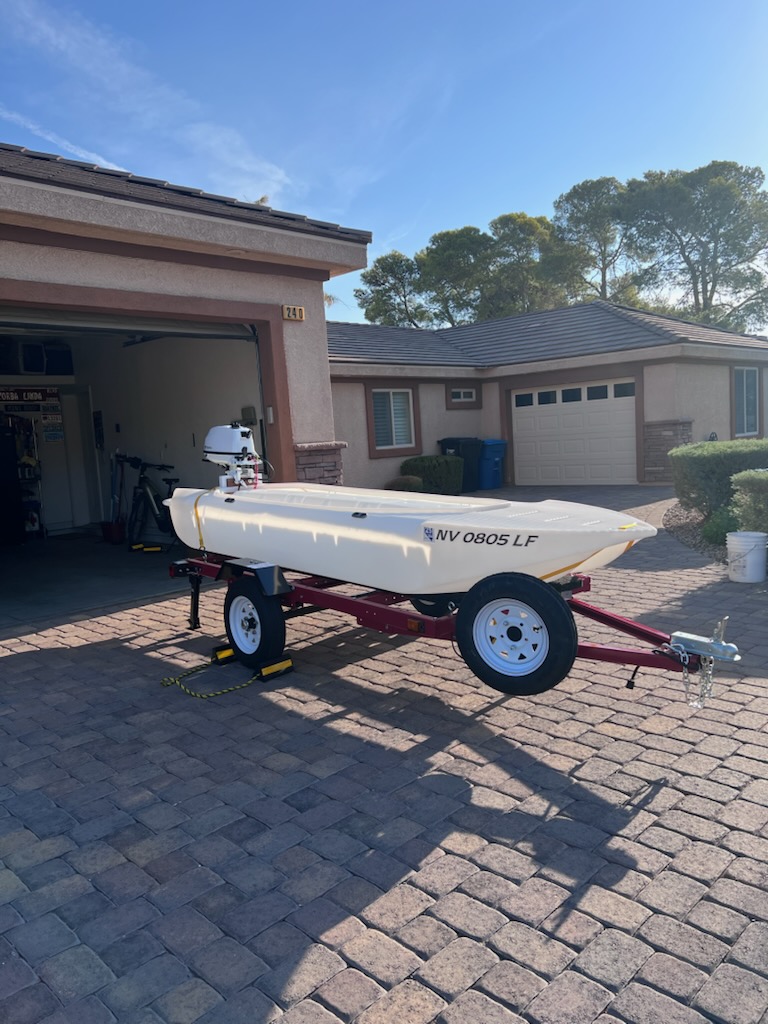
Michael Kilbourn, Nevada
Went to Lake Mead a few weeks ago without the motor, and last Wednesday to Willow Beach on the Colorado river, in Arizona, with the motor. I like it and will enjoy it much more when it’s not 113 degrees out…
Pennsylvania
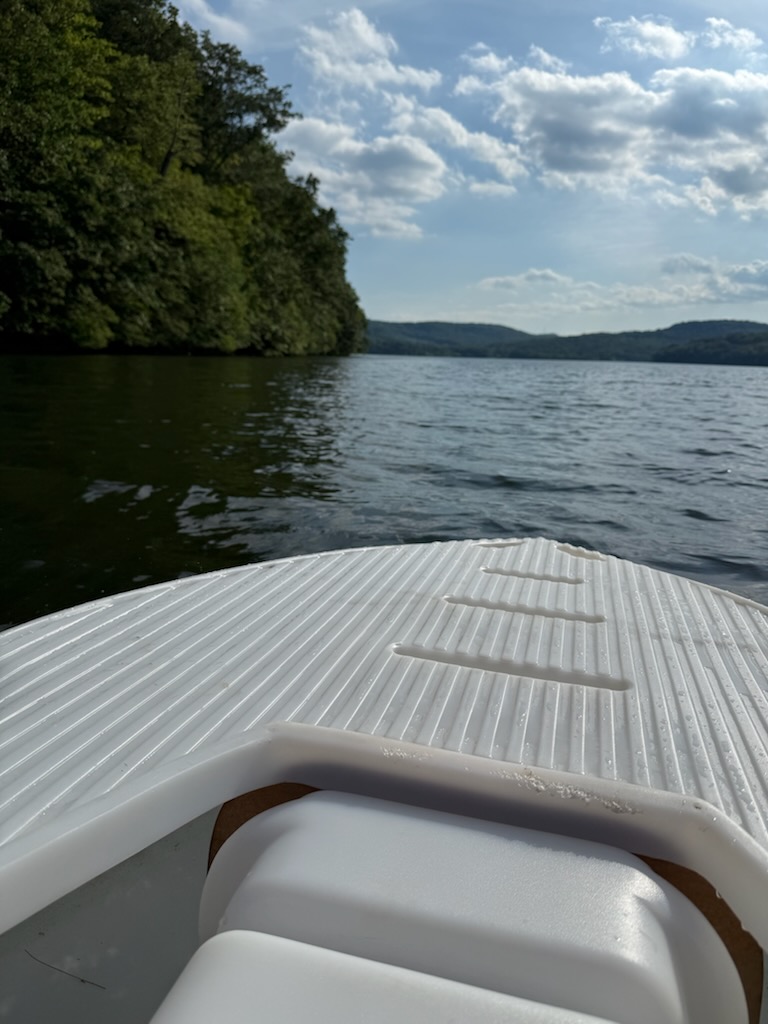
We love our S4! It’s so stable and comfortable! Lots of people ask us about it.


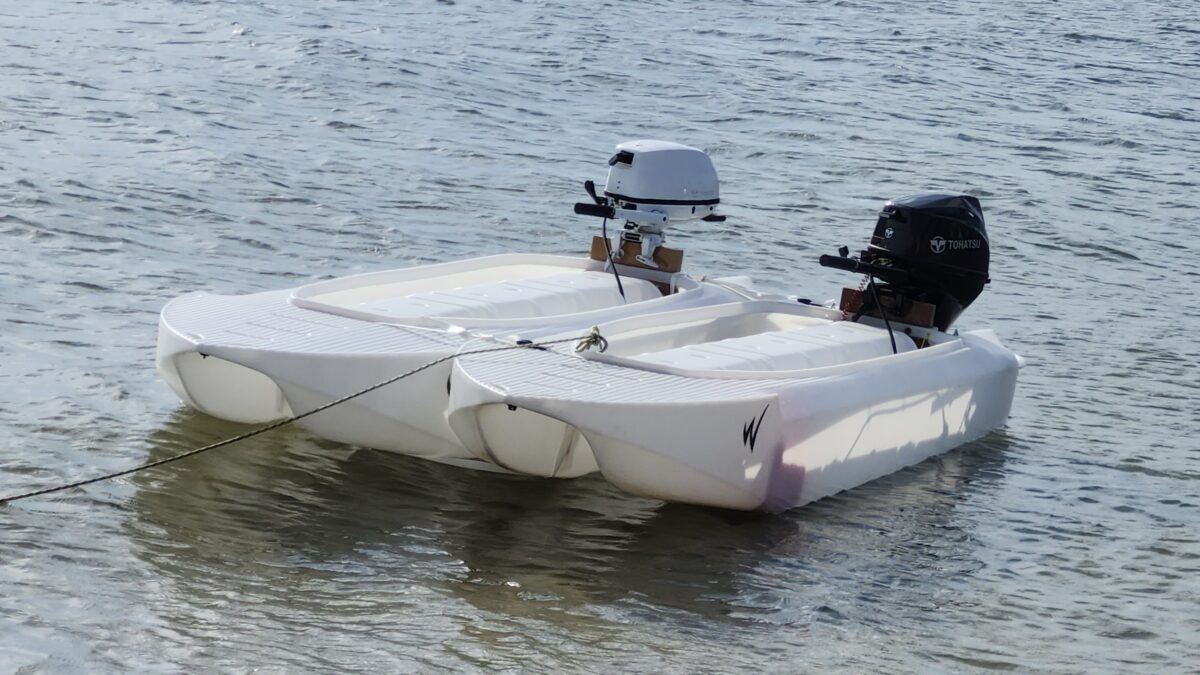
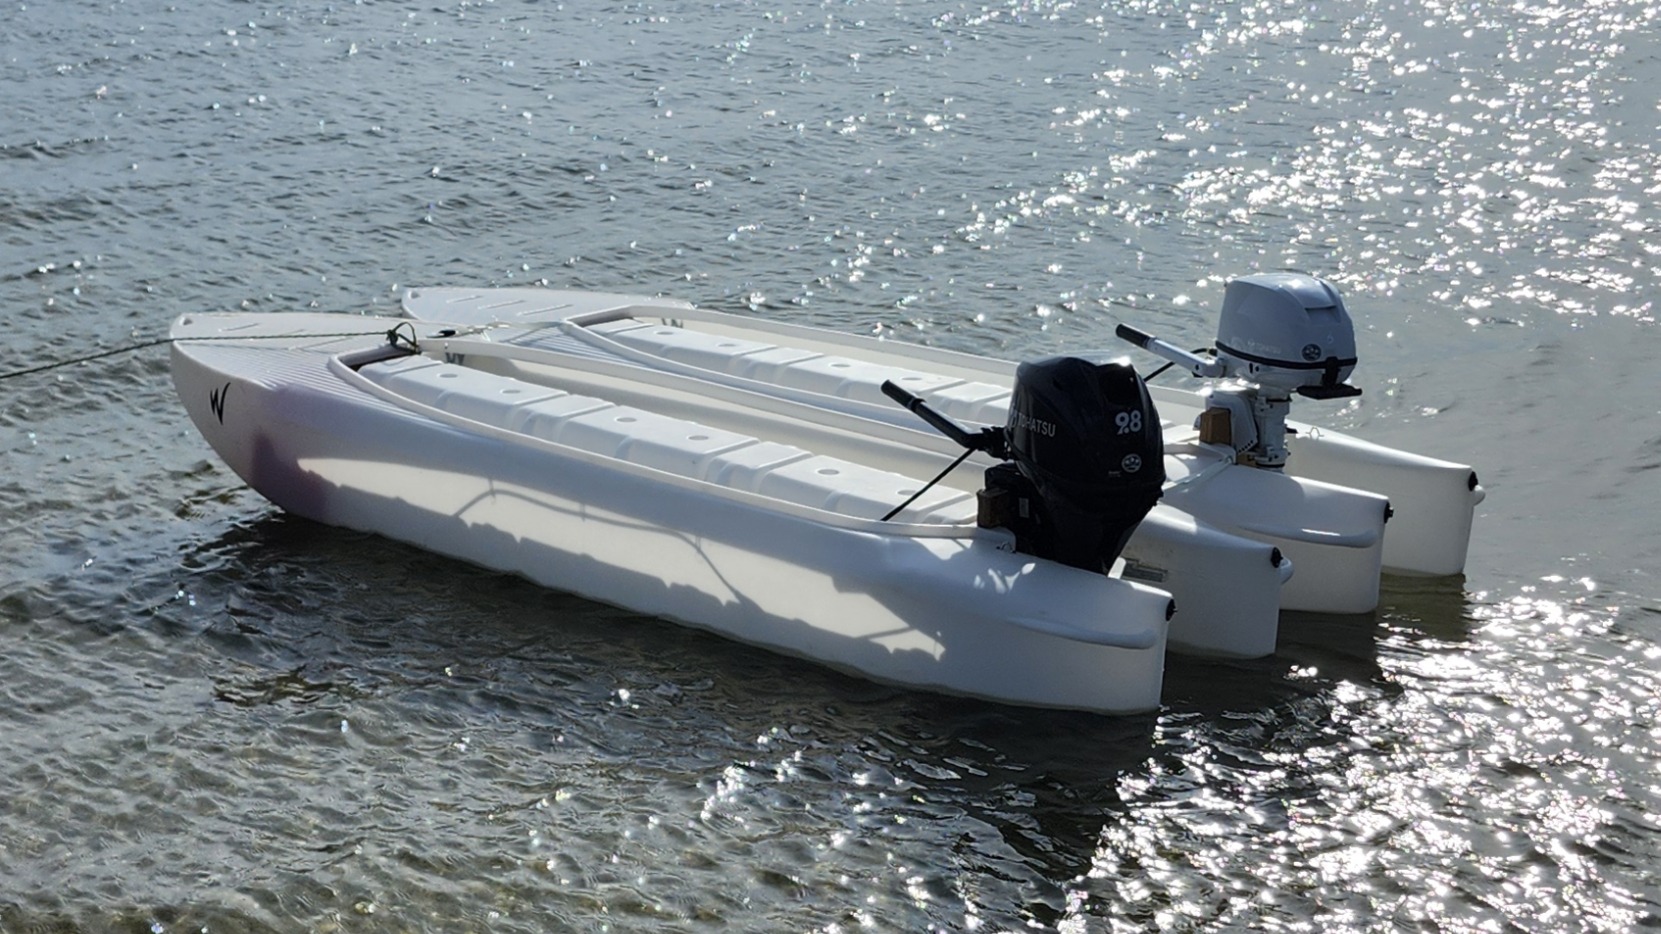
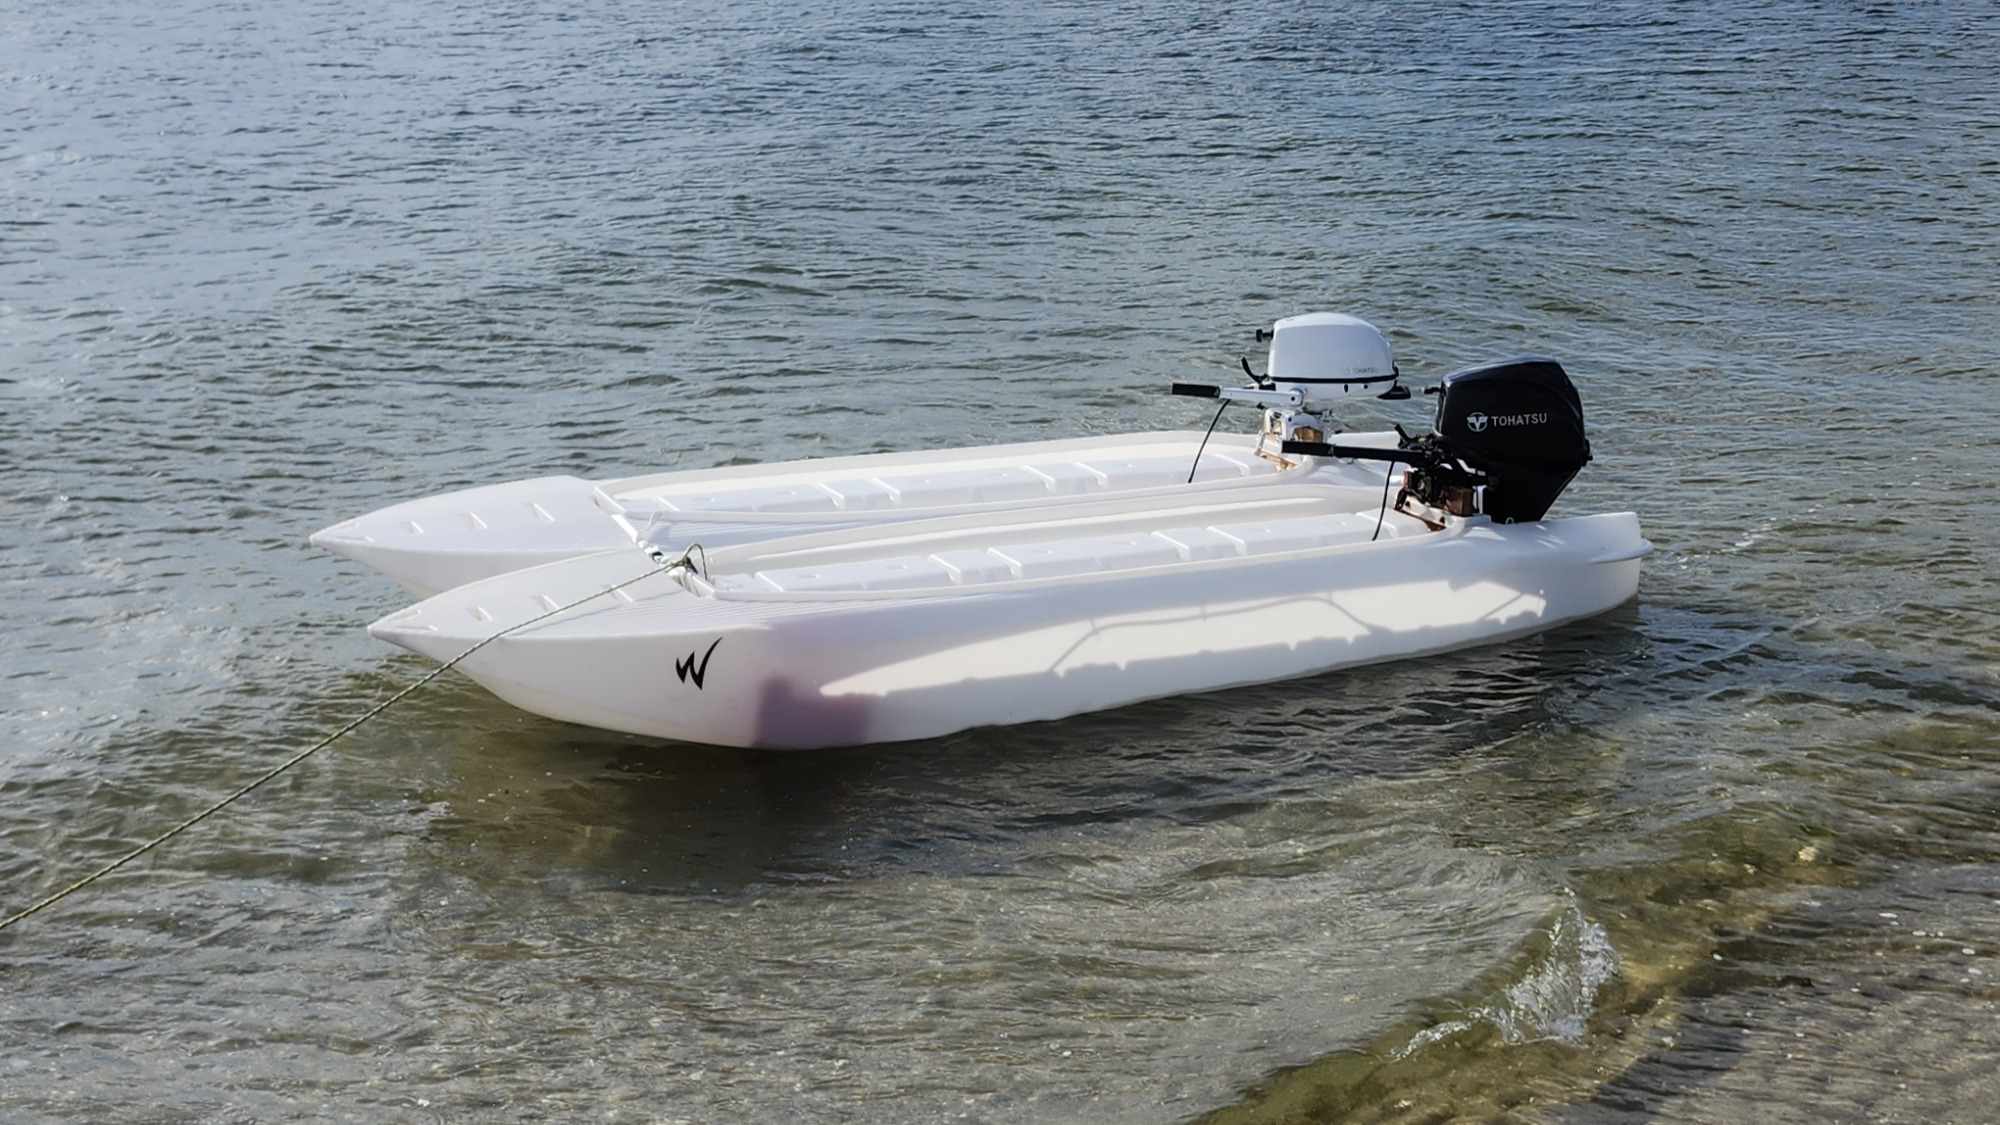
The S4 Duo is an ultralight, very stable, 13′ long and 76″ wide motorboat formed from a pair of perfectly-matching twin-hull S4 Microskiffs attached together with a pair of straps.
The S4 Duo can be instantly transformed from a full-size boat into two separate kayak-size microskiffs, and vice versa.
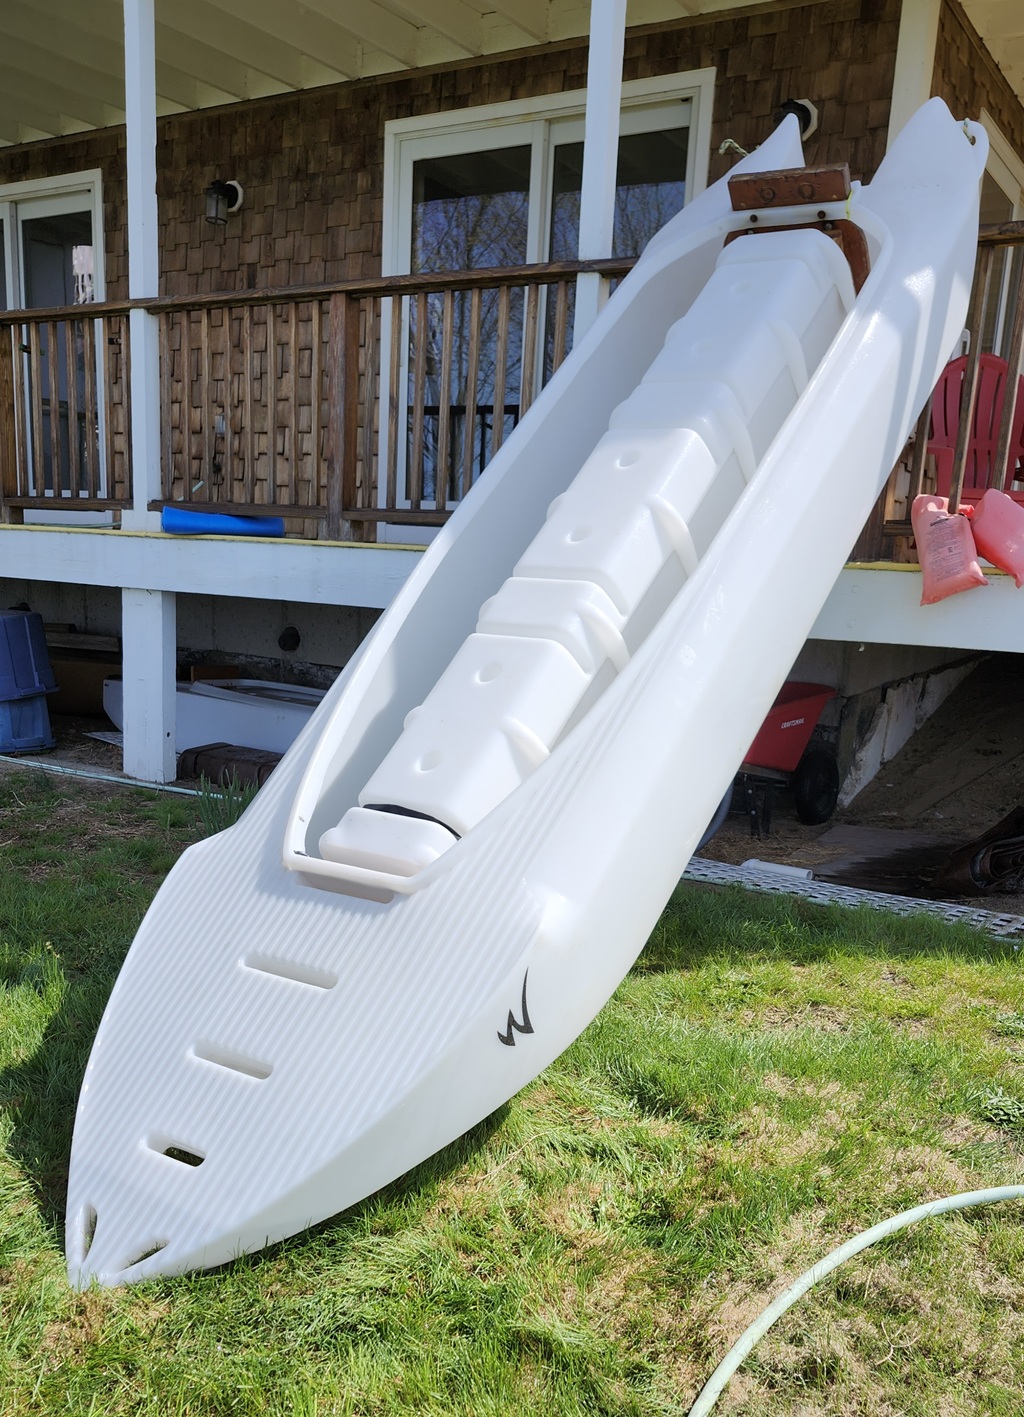
An S4 Microskiff is 38″ wide and weighs just 100 lbs. One person can attach and detach two S4 Microskiffs quickly and easily on shore and in the water, car-top and transport them side by side on a roof rack, and store them on top of each other to save storage space.
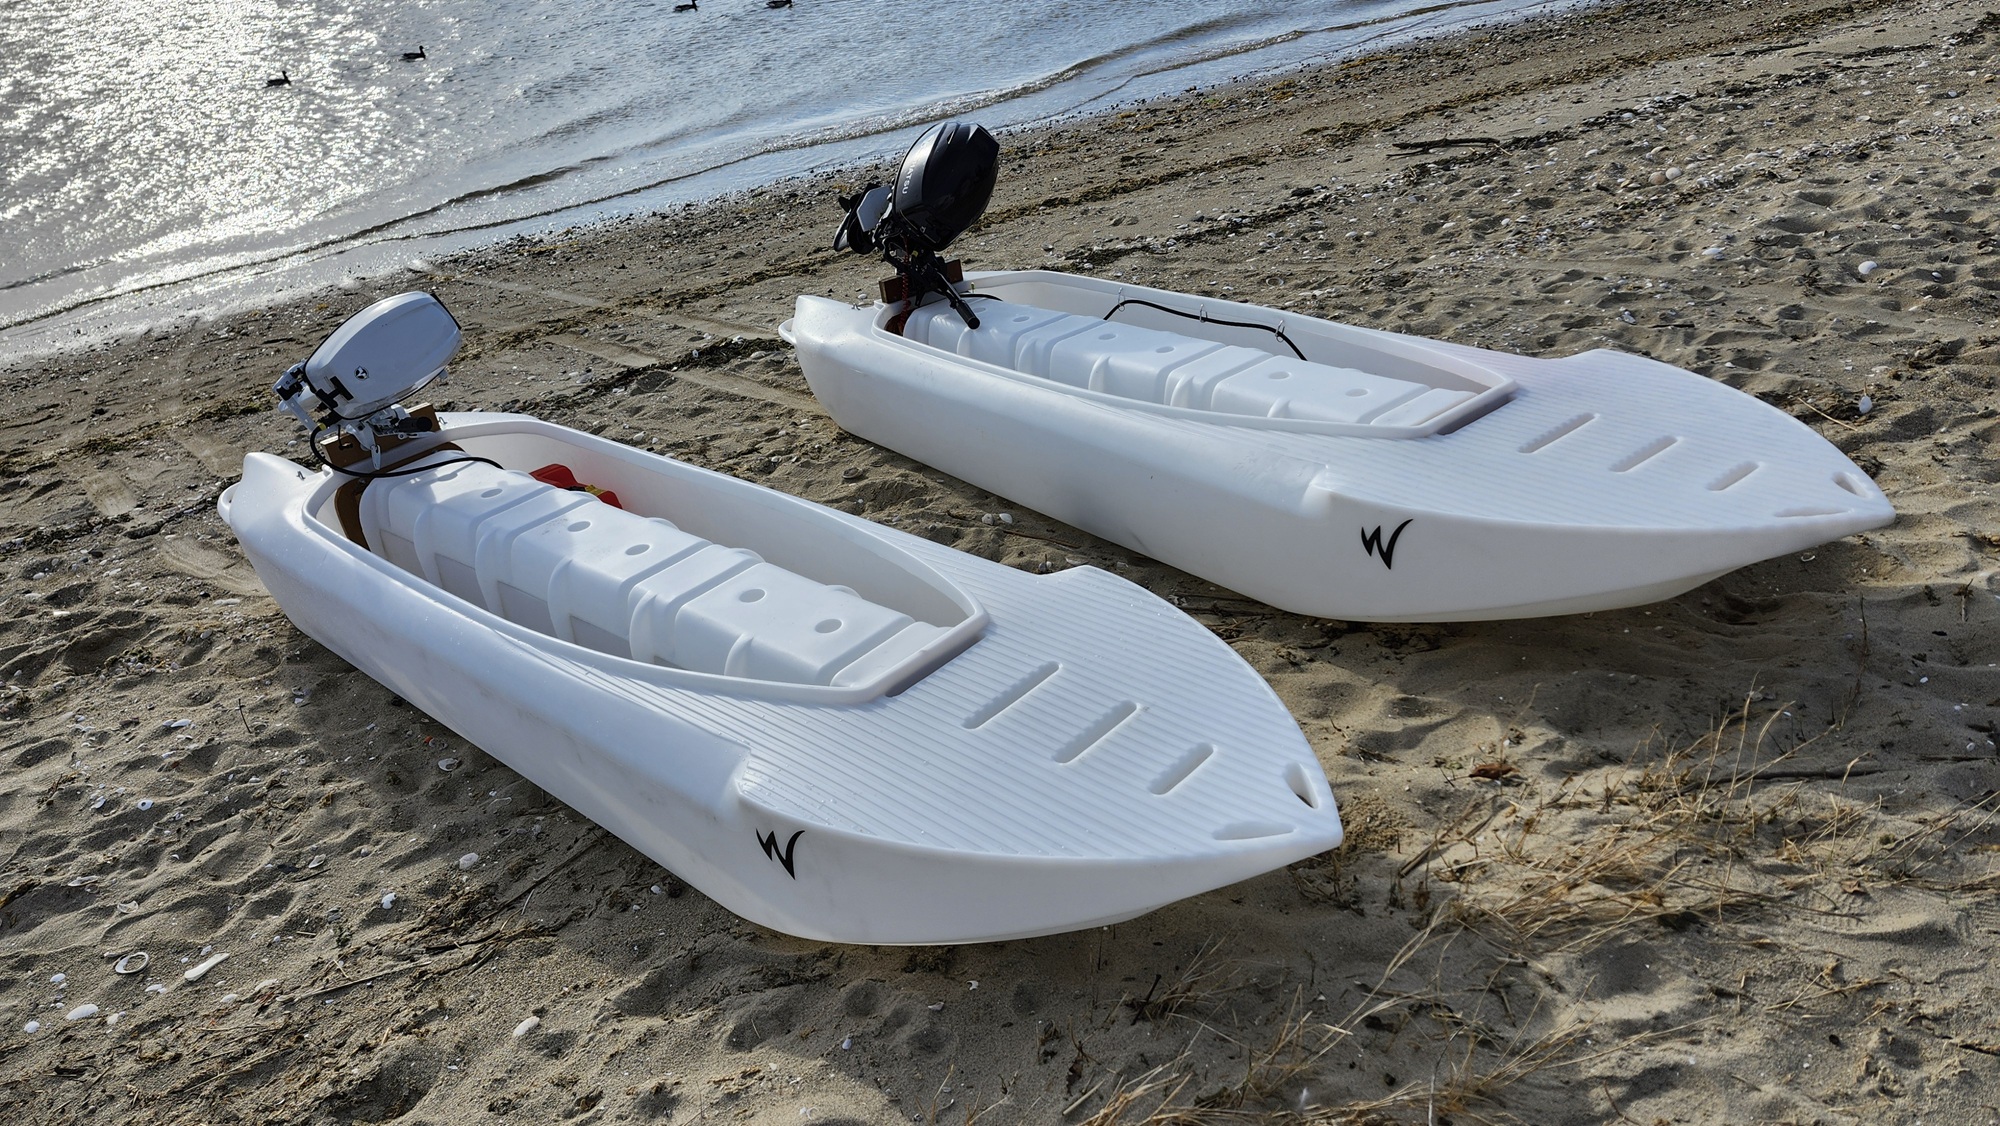
Since S4 Microskiffs are so lightweight they are easy to carry, and can be launched and beached anywhere, as well as go in very shallow water, rocky water, mangrove tunnels, and marshes.
The S4 Duo has a total load capacity of 1,200 lbs, and it can carry onboard six adult passengers comfortably sitting facing forward and sideways. It is stable enough to allow passengers to stand confidently in choppy water, even when the two S4 Microskiffs are detached and used separately.

Each S4 Microskiff can serve as a motorboat, a kayak, a canoe, and a dinghy. The S4 Duo can be used it in different places at the same time as two S4 Microskiffs, whether this was planned in advance or in response to new developments and fresh ideas.
S4 Microskiffs are rated for a 6 HP motor*, and the S4 Duo can be driven with one or two outboard motors.
A driver sitting in the left S4 Microskiff (cockpit) of their S4 Duo can easily access all the controls of the motor that’s on their right, start it while seated in the left cockpit, and drive with both motors on. Connecting the two motors with a rod is quick and easy, and it allows the driver to steer with either the left or right tiller, interchangeably, as well as control the each motor’s RPM directly:
The driver can also drive with two unconnected motors while locking one of them in a forward position, or at an angle that would help the boat track in waves and currents.
Price: $5,390.
* We don’t ship to islands, and addresses in very remote locations may not qualify for for free shipping.
Contact us for a quote on shipping to your address –
CAR-TOP TRANSPORTATION
There is no need for a special boat trailer to transport the S4 Duo since its owner can car-top the two lightweight S4 Microskiffs one after the other on a roof rack with 80″ crossbars.
Two S4 Microskiffs can be transported side by side on a flatbed trailer.
LAUNCH AND BEACH ANYWHERE
S4 Duo owners are free from the need for a boat trailer or boat ramp, since they can carry, launch and beach two S4 Microskiffs almost anywhere:
GO ANYWHERE
Some waters, such as mangroves and marshes abound with thick or tall vegetation, and some waterways such as small creeks are too narrow, shallow, or obstructed with rocks or logs to allow for the passage of a regular size boat. But the S4 Duo can be split into two nimble kayak-size S4 Microskiffs that can be driven or paddled separately, so that S4 Duo crews can overcome such natural limitations, and be free from the fear of getting stuck or stranded.
EASY CARRYING ANYWHERE
Using small wheel-carts, S4 Duo crew members can carry it as two separate lightweight S4 Microskiffs in parking lots and on sidewalks, streets, and small docks.
S4 Microskiffs can also be carried by hand by two people (portaging), or just dragged over muddy or rugged terrain and sandy beaches, as well as in narrow pathways in the woods. This makes accessing almost any beach possible, as well as launching from it.
SUPER VERSATILE FAMILY BOAT AND YACHT TENDER
The entire family can go in the S4 Duo as one crew, and each family member can use an S4 Microskiff independently, according to their liking or circumstances, such as guests, friends, emergencies, etc.
Yacht passengers can drive their S4 Duo to shore together, or drive and paddle separately in two S4 Microskiffs.
Using an S4 Duo as a tender practically means having at your disposition two nimble and high-performance tenders that you can effectively motorize and paddle.
MULTI-HULL SAILBOAT
With its 200 lbs and 76″ wide lightweight multi-hull, the S4 Duo can be turned into an ideal sailing dinghy powered with a big sail, with no need for a dagger board. The combination of a durable and resilient polyethylene hull with a very shallow draft makes the perfect for sailing in shallow and rocky waters, and the option to propel it with a lightweight outboard gas motor makes it safer in unexpected adverse conditions.
The twin hulls of the S4 Microskiff are straight, flat, and parallel, and this enables attaching two of these boats to each other with a perfect fit, as seen in this animation:

The front strap can be attached through the first (broadest) slots in the S4 Microskiffs’ bows, which are 2 inches higher than the boat’s floor level.
Tying the strap through the second slots, which are 6″ higher than floor level, will raise the strap by an additional 4 inches.
The rear hull tips can be attached with a simple loop of the strap, and the bows can be attached using either a simple loop or an X crossed loop, which would reduce spray.
Using a Grabber Reacher Tool can help catching the strap ends from the water. Once you’re in the boat you can further tighten the straps.
Never use ratchet straps on a polyethylene boat.
* Some S4 Microskiff owners outfit it with a 9.8 HP or 9.9 HP motor. It requires modifications to the transom and the motor, and we don’t recommend it. This said, it makes more sense in the context of the S4 Duo, which could be powered by close to 20 HP in total.
Why, where, and how to install scuppers in your S4 Microskiff
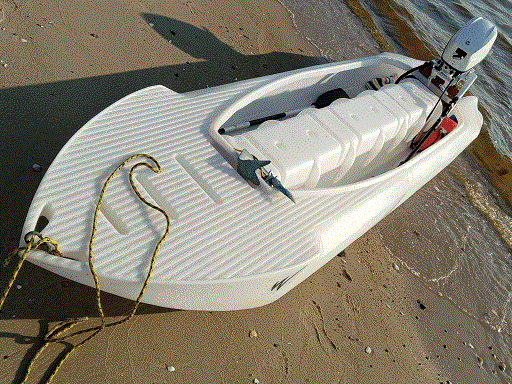
The S4 Microskiff is offered without scuppers because typically there isn’t enough water accumulating in its hulls to justify a special drainage device, especially since wiping the water with a big towel does the job in most cases, and in the rare cases when there is enough water on the bottom of a hull to allow for priming a manual or electric pump, using one drains the water within seconds, and so does a simple hand bucket.
Some S4 Microskiff owners outfit it with scuppers, usually because they have to use a garden hose to rinse plenty of dirt and fish blood out of the hulls, which requires draining out a lot of water.
Note that drilling large diameter holes in the cockpit rim works as well as scuppers in the stern, and it just requires flipping the boat.
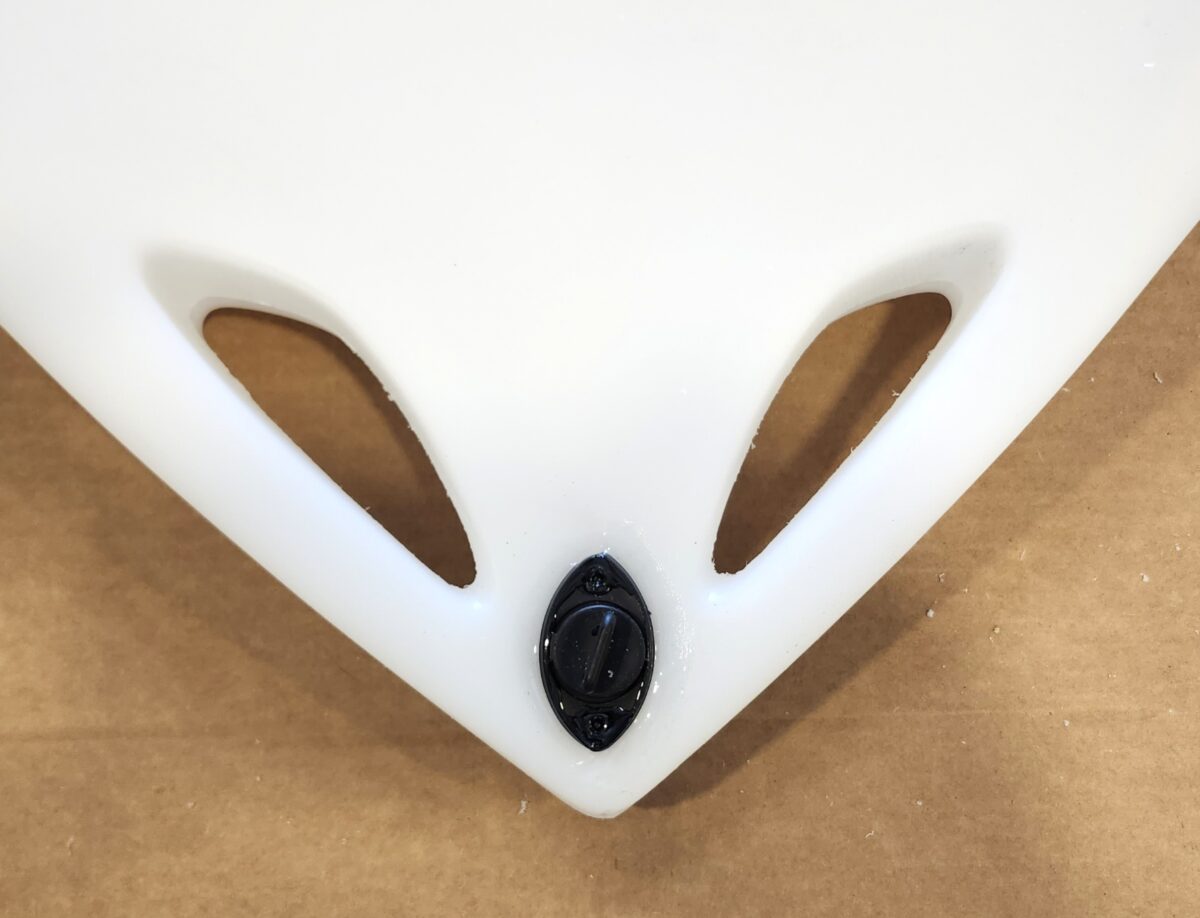
Installing a scupper below waterline is hazardous, and therefore, the favorite place for installing these accessories is around the top of the hulls’ rear tips, as seen below. This is a good place, except that it requires flipping the boat in order to drain the water out, and it restricts visibility and access when you spray water into the hulls – It’s no big deal, just somehow inconvenient.

Alternatively, the picture on the top of the page shows a scupper installed on the underside of the bow tip, high above the waterline.
This forward location allows for rinsing the interior of the hulls with a hose without flipping the boat. However, this plug location requires raising the stern considerably (see below picture) for drainage to be effective – a pulley can help in such case.
Note that the scupper in this frontal location does not interfere with the usage of the bow tip handles.
Generally, we recommend removing the plug from the scupper hole when draining the boat in order to avoid clogging as much as possible.