Updated February 6, 2025
This article offers information about designing a simple, sturdy, and effective DIY wheel cart for the S4 Microskiff from inexpensive materials and parts that are available in hardware stores and online.
Do I need a wheel cart for carrying my microskiff or kayak?
Whether you need to carry your S4 with an outboard motor attached to it in a microskiff configuration, or without a motor, as a kayak / canoe, you will need a wheel cart in case you’re prevented from simply dragging it on the ground.
You should avoid dragging your S4 over abrasive surfaces such as asphalt, concrete, and rocks, and you could drag it on sand, pebbles, gravel, dirt and grass, if there is no motor mounted on it and it’s not loaded with heavy gear.
However, with a 6 HP outboard motor mounted on your S4 and plenty of gear and fuel stored in its hulls, you will most probably need a wheel cart.
There are many wheel carts for canoes or large-size kayaks available on the market, at reasonable prices, but none fits the hulls of the S4, and most look like they’re not stable enough, and too flimsy to carry this boat with its motor mounted on it.
Most S4 owners build their own wheel cart from wood or aluminum, and this article offers one type of DIY solution among others.
Wheel cart parts
We suggest the following parts for such project:
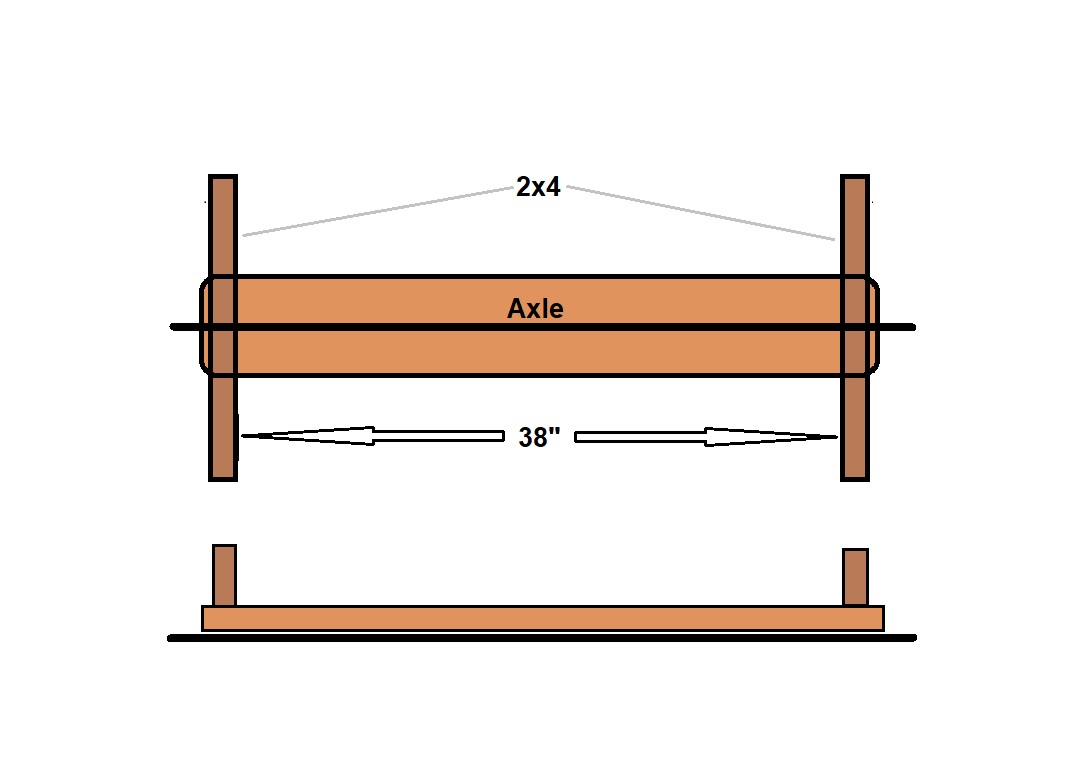
- A 42″ long 2×6 wooden board, preferably from pressure-treated (PT) pine.
- Two 24″ long 2×4 wooden boards, preferably from PT pine*
- Screws or bolts to attach the short boards to the main board
- A pair of wheels
- An axle that fits the wheels, and matching axle brackets**
- Washers and cotter pins for the wheels
- Eye bolts or eye screws for attaching straps to the ends of the small boards***
- Regular straps for attaching the boat to the ends of the 2×4 boards. Do not use ratchet straps.
* Steel or aluminum tubes exposed to direct sunlight in the summer can become very hot and therefore require insulation before you attach a kayak or a small boat to them.
** It’s possible and it may be cheaper to use a short wheelbarrow axle on each end of the board instead of a single long axle along the entire board.
*** You can drill holes for attaching the straps instead of using hardware.
When possible, using stainless steel is preferable to regular steel, but in case you’re on a budget and you must use parts made from regular steel, you may want to spray a few coats of spar urethane on them. You should also coat the wooden parts with spar urethane or urethane lacquer such as sold in hardware store. You don’t have to waste your money on special urethane lacquers for boats, because the regular products sold in hardware stores are good enough.
How to build your wheel cart step by step
The wheels
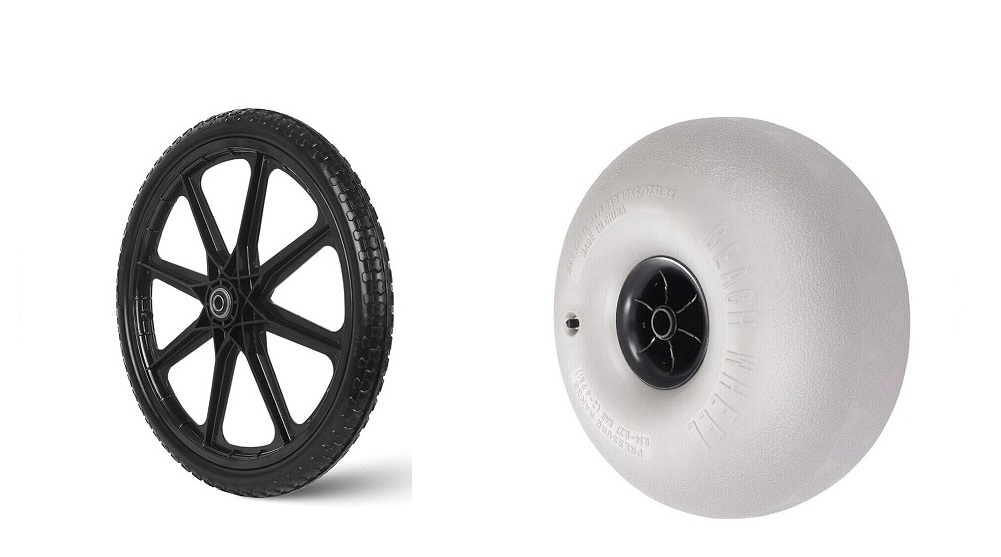
The first and most important step is choosing the wheels for your wheel cart. In general, you want the wheels to be as big as possible, namely with the biggest diameter, because the bigger diameter the easier it is to go over obstacles such as rocks and tree roots. If you can’t find 20″ diameter replacement wheels for wheelbarrows at your local home improvement store, you can order them online. Such wheels would do well enough on asphalt, concrete, gravel, pebbles, grass and rocky surfaces, as well as in wood trails riddled with tree roots. This said, being relatively narrow, these wheels won’t work well in deep sand –
Deep sand is the most problematic terrain, because microskiff loaded with motor and gear is heavy, and the wheel cart carrying it will generate a lot of resistance from the sand. Carrying a loaded S4 down to the beach may not be hard, but carrying it back, up the beach could prove to be quite difficult. For this reason, if you’re planning to carry your S4 microksiff over sandy beaches, you need to outfit its wheel cart with wheels that are at least 6″ wide and 15″ in diameter. Such wheels are available online. Note that they tend to be heavy, so before you choose which ones you’ll order, try to find a pair that’s more lightweight.
Types of wheels –

The axle
Once you’ve chosen the wheels for your wheel cart, you can start looking for an axle for them. Be sure that the axle fits the internal diameter of your wheels, and that it’s long enough to protrude on both sides of the main plank, including room for the cotter pins and washers. Stainless steel tubes are sold online, in case you can’t find one locally.
Assembly
We won’t go into the details of the assembly, since the process is pretty straightforward, but here are a few things worth consideration –
The 2×4 vertical wooden boards
The purpose of the vertical 2×4 boards is to keep the boat in place and prevent the wheel cart from turning sideways if one wheel bumps into an obstacle. In case you’re planning to carry your S4 microskiff along narrow paths and you’re concerned about the overall width of your wheel cart, you can attach the 2×4 vertical boards to the middle part of the main board, so that they would fit in the space between the S4 hulls. Doing this would save you 4 inches in total, but it could make attaching the boat to the wheel cart a bit tricky.
Try to build strong, and make sure there are no metal parts such as screws, bolts and brackets that protrude in a way that could make them scratch your boat.
The wheels
You may want to apply several coats of spar urethane on the wheels’ metal parts, in case they feature such parts.
Don’t forget to grease the wheels!
Onboard storage of your wheel cart
Such wheel cart is both bulky and heavy, and there are two approaches for storing it onboard in case you want to –
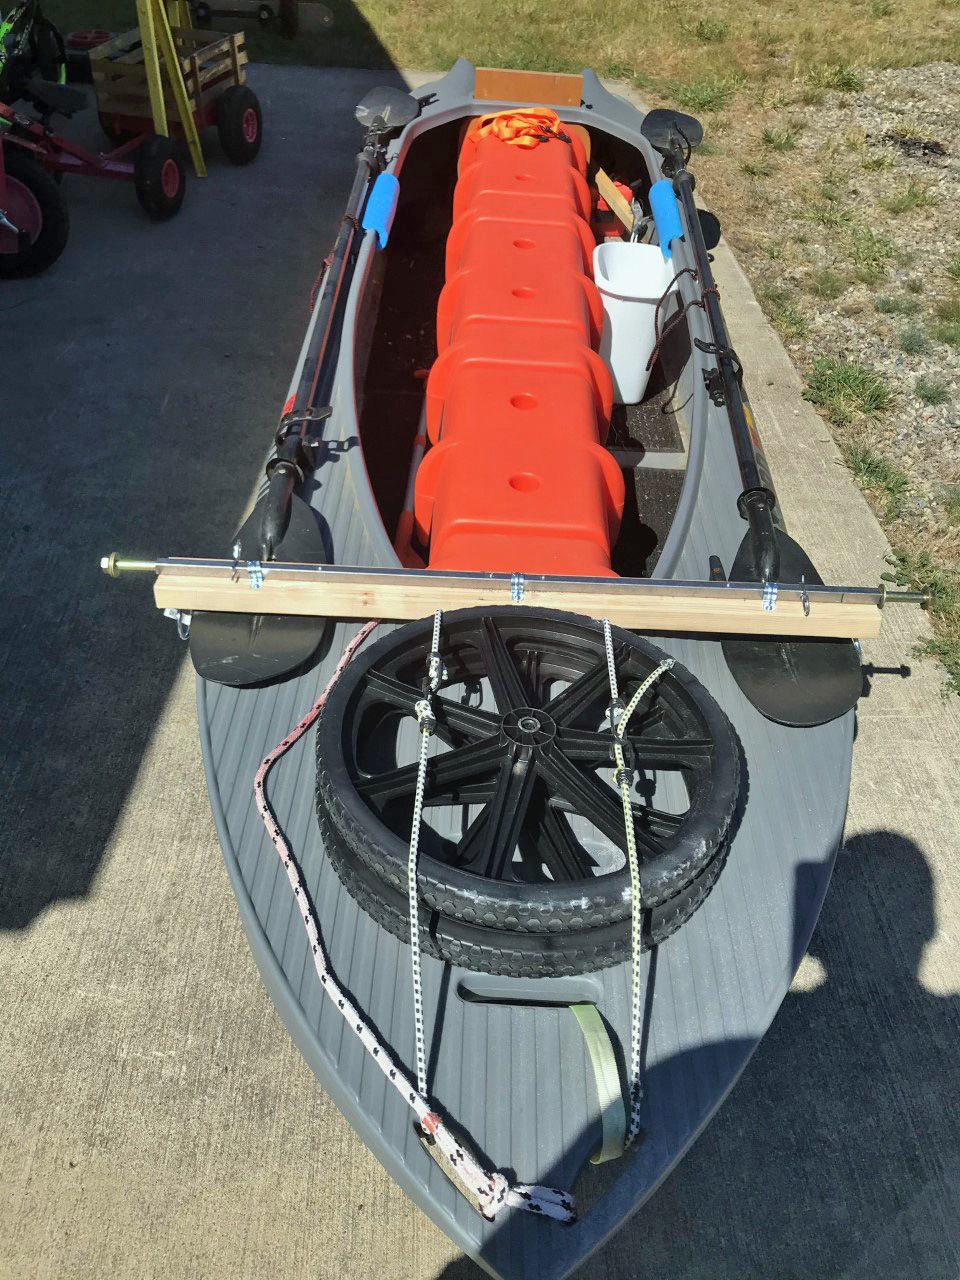
The first is to attach it firmly across the cockpit or the casting platform, and the second is to dismount the wheels and store them inside the hulls, and do the same with the wooden board. Both solutions work well since storing heavy payload in the front of a microskiff helps keeping its bow down thus improves its trim.
Whether you choose one solution or the other, make sure to secure everything properly, so that it won’t get lost or disturb you when you drive, fish, etc. The front of the S4 offers strong and convenient molded-in attachment points under the casting platform, and you can also add eyelets or other types of brackets there, or simply drill holes in the coaming.

More info on Noah’s wheel cart for carrying an S4 kayak in mountain trails »
In this article we attempted to summarize the knowledge we’ve accumulated over two decades of using wheel carts for our own kayaks and microskiffs, as well as the knowledge we obtained through inputs from Wavewalk kayak and microskiff owners who’ve created wheel carts according to their specific needs.
Our website’s S4 Reviews and W720 Reviews pages feature links to dozens of clients’ reviews that include photos and info on their DIY wheel carts.
Additional info is available in dozens of technical articles listed on our website’s Directory of Articles page »
We’ll be happy to assist you with your wheel cart project. Please feel free to call, text or email us if you have questions.


