Wavewalk 700 skiff with 5 HP Tohatsu outboard motor and electric trolling motor

By Captain Larry Jarboe


I think the yakkers I passed yesterday weren’t very happy to see me…

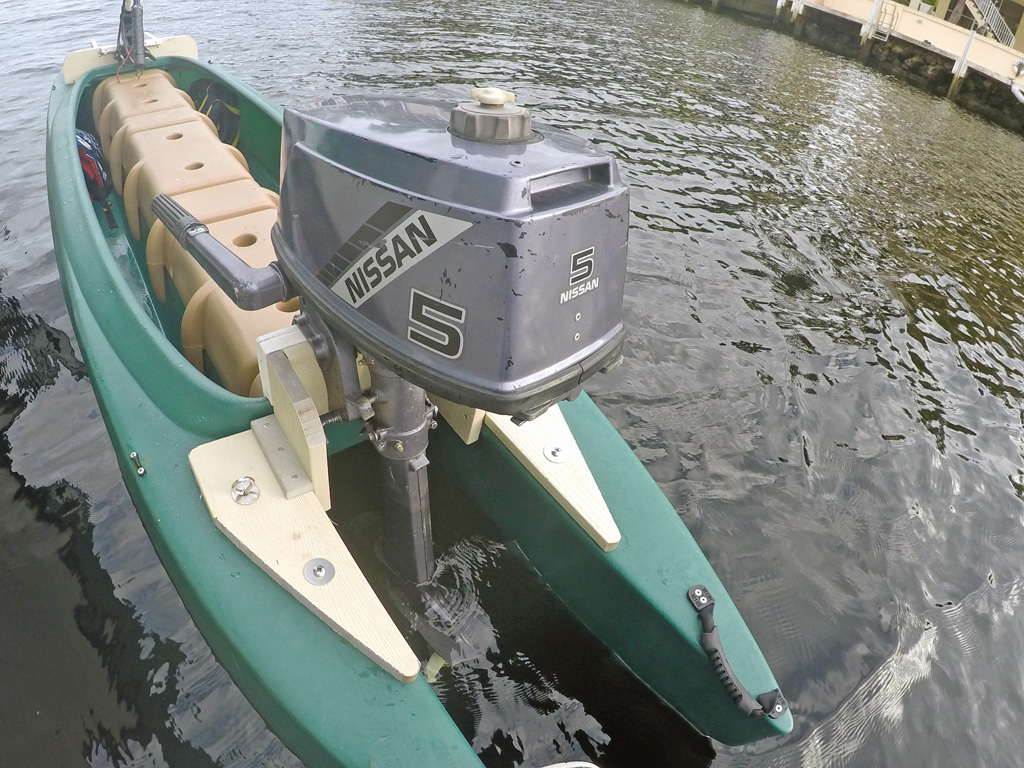
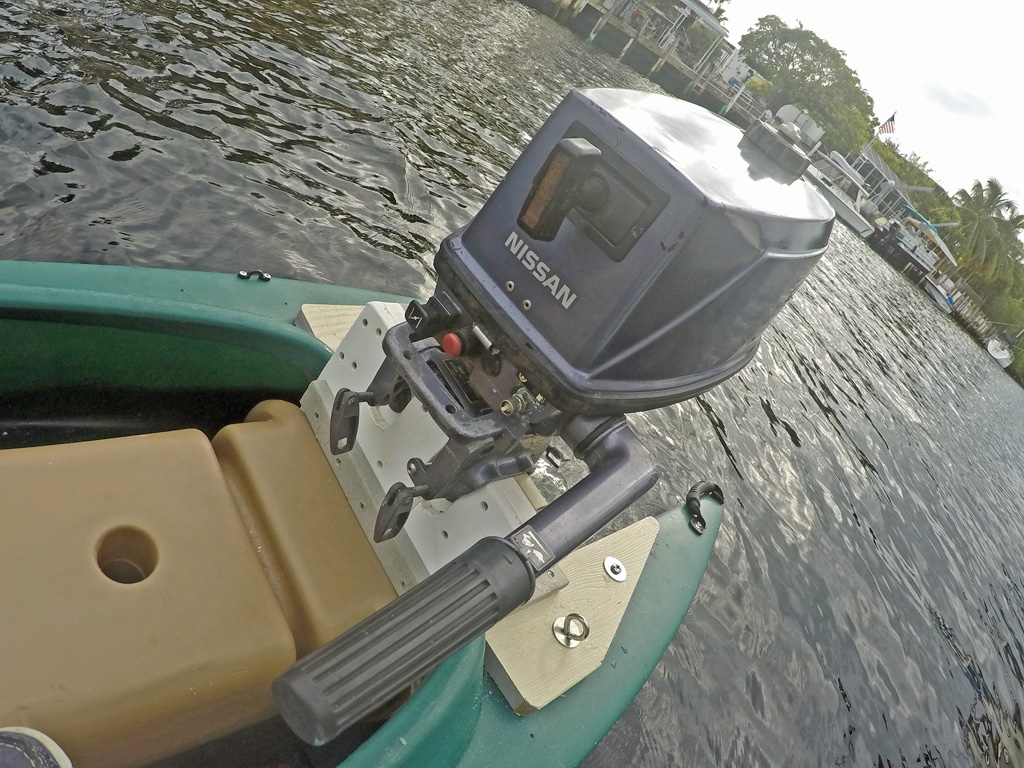
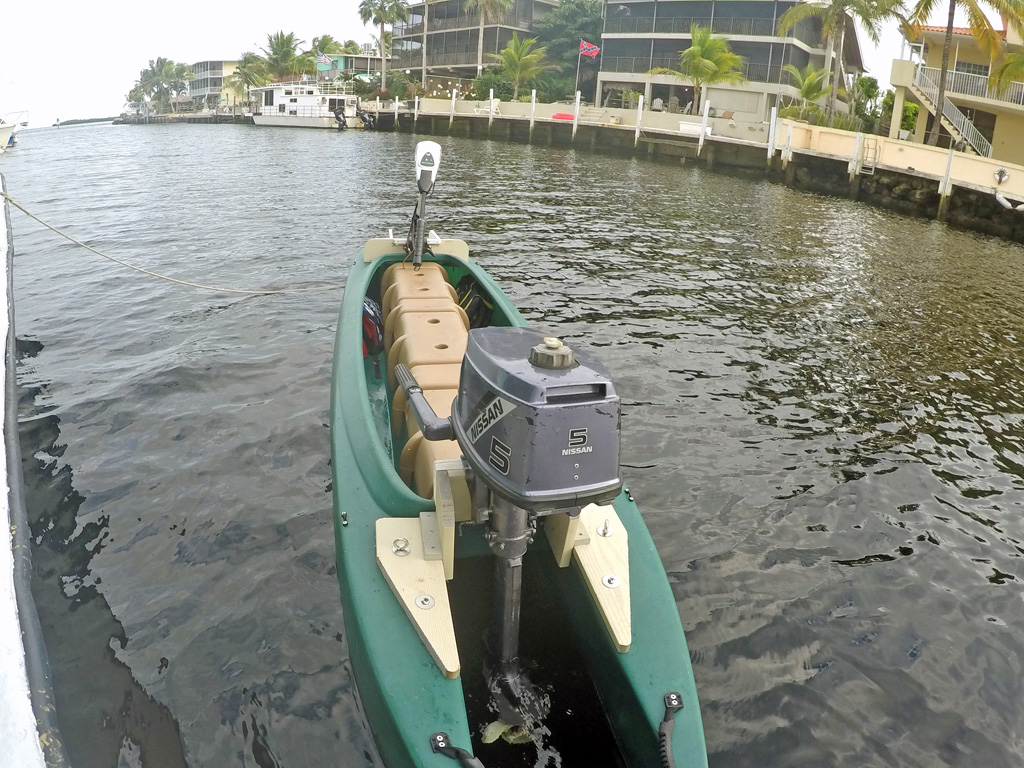
Here’s a couple quick pics of my DIY motor bracket and 5 hp long shaft 2 stroke Nissan (really a Tohatsu) outboard motor. I got the refurbished motor from Brandon Kurz at BMK Enterprises near Deerfield Beach. Brandon runs an outboard and small boat repair shop near I-95. He is a great source for affordable long shaft motors for our Wavewalk adventures.

The motor bracket is mostly HDPE decking material with some Azek board. It is glued and screwed with PVC cement and Torx head self tapping stainless screws.

This rock solid bracket is relatively removable with only four thru bolts passing through the upper rear deck. I really don’t like drilling holes in my Wavewalks but I don’t want my Nissan passing my W700.

I estimate that this rig planes at 12 knots. It is a blast to go fast in a USCG designated kayak.

Obviously, a lot more sea trials have to occur. The kayak and stand-up board purists may have a hard time identifying with a cracker yakker zipping past to parts far beyond the reach of paddlers, pole pushers, and pedalers. But, although it may defy convention, having the fastest yak in South Florida does rate bragging rights.

And, I have not yet begun to flout and tout my magic boat!

W700 skiff with 5HP outboard and electric trolling motor

13 ft skiff with 5HP outboard and electric trolling motor

Portable skiff with 5HP outboard and electric trolling motor, FL


Video added a few days later:

More fishing adventures with Capn’ Larry »


Paddling and sailing the Great Lakes with my Wavewalk 700

By Forrest Henry

Michigan

Everything is fine. Only been able to use the kayak for a few hours, but love it.
I also sailed the kayak for a while using the Wind Paddle sail. Looking forward to spring!!

I finished the spray skirt this morning. The driveway marker was too stiff, so I used a fiberglass flat strip that was part of a canopy for my rope hammock. The canvas lays on my lap when I sit in the center of the kayak.
I also attached a piece of lexan with velcro to the back of the kayak to use as a table.

wavewalk-700-kayak-with-spray-skirt-2-1024

wavewalk-700-kayak-with-spray-skirt-3-1024

wavewalk-700-kayak-with-spray-skirt-1024

wavewalk-700-kayak-with-wheel-cart-1024

And for a cart I am using a modified Magnus cart from paddlelogic. When the off-the-shelf Magnus did not fit, Dave, the owner, was very accommodating and made arms that are 3 inches longer and a wider axle.

No sailing pictures yet.

How to watertight rivets in kayaks and boats

Pop rivets are widely used in the construction of boats, canoes, and kayaks.
Sealing rivets can be useful as a measure of extra precaution in case they come in contact with the water through which your kayak or boat goes.

What type of rivets to use?

Rivets for kayaks split in three, in order to better grip the plastic. Simply search online for ‘rivets for kayaks’.

How to better seal the rivets

Here are some tips for watertight riveting of kayaks and small boats made from Polyethylene –

  1. Polyethylene is the most widely used polymer resin (namely “plastic”) in kayaks, and it’s softer than aluminum and fiberglass used to produce other small boats. For this reason, it is recommended to use special aluminum rivets designed for riveting jobs in kayaks. These special rivets split in three, which increases their grip on the surface around the rivet. You can get these rivets in outfitters stores, and online.
  2. Drill holes of exactly the same diameter of the rivet that you use (3/16″), and preferably slightly smaller holes (5/32″).
  3. Apply a dub of Goop adhesive on the hole, and push the Goop into the hole. Goop is a powerful watertight adhesive used for plumbing and marine projects. The Goop you squeeze into the hole will coat its sides, and come out on the other side.
  4. Before you insert the rivet into the hole, coat its end with Goop. As you push the rivet into the hole, its tip will come out on the other side, and it will be coated with a thick layer of Goop. The sides of the rivet will be coated with Goop as well.
    gooping-the-rivet-01
    A rivet dipped in Goop watertight adhesive

    As you pull the rivet’s mandrel, the rivet will split in three and it will attach the two plastic walls while being coated with Goop. Excess Goop that will not come out on the other side or coat the sides of the hole, will remain on the outer surface and get squeezed by the rivet’s head. This way, the rivet’s parts that come in contact with the plastic will be coated with Goop, which will make them watertight.

  5. After you’re done riveting, coat the rivet’s head and the surface area around it with a generous amount of Goop. This will prevent water from touching the rivet, and in case of saltwater, it will prevent corrosion.

Do you have any questions for us?

Click to send us an email Click to send us a text message Click to call us